

Configure Sign in with Klarna
This page explains how to configure and style Sign in with Klarna in your PrestaShop store. It describes how to enable the feature in the Klarna module and how to ensure the Sign in with Klarna button appears correctly in your store.
4 min read
Overview
Sign in with Klarna allows customers to log in to your store using their Klarna account. This provides a smoother login experience and can help customers check out faster by using stored Klarna details.
Learnings
Learnings:
Sign in with Klarna can reduce friction during login and increase the likelihood of returning customers completing their purchase.
Redirect URL and scopes
Sign in with Klarna requires the correct redirect URL and OAuth scopes to be added in the Klarna Merchant Portal:
1. Go to Conversion boosters > Sign in with Klarna in your Klarna Merchant Portal
2. Select your store and click the Manage button
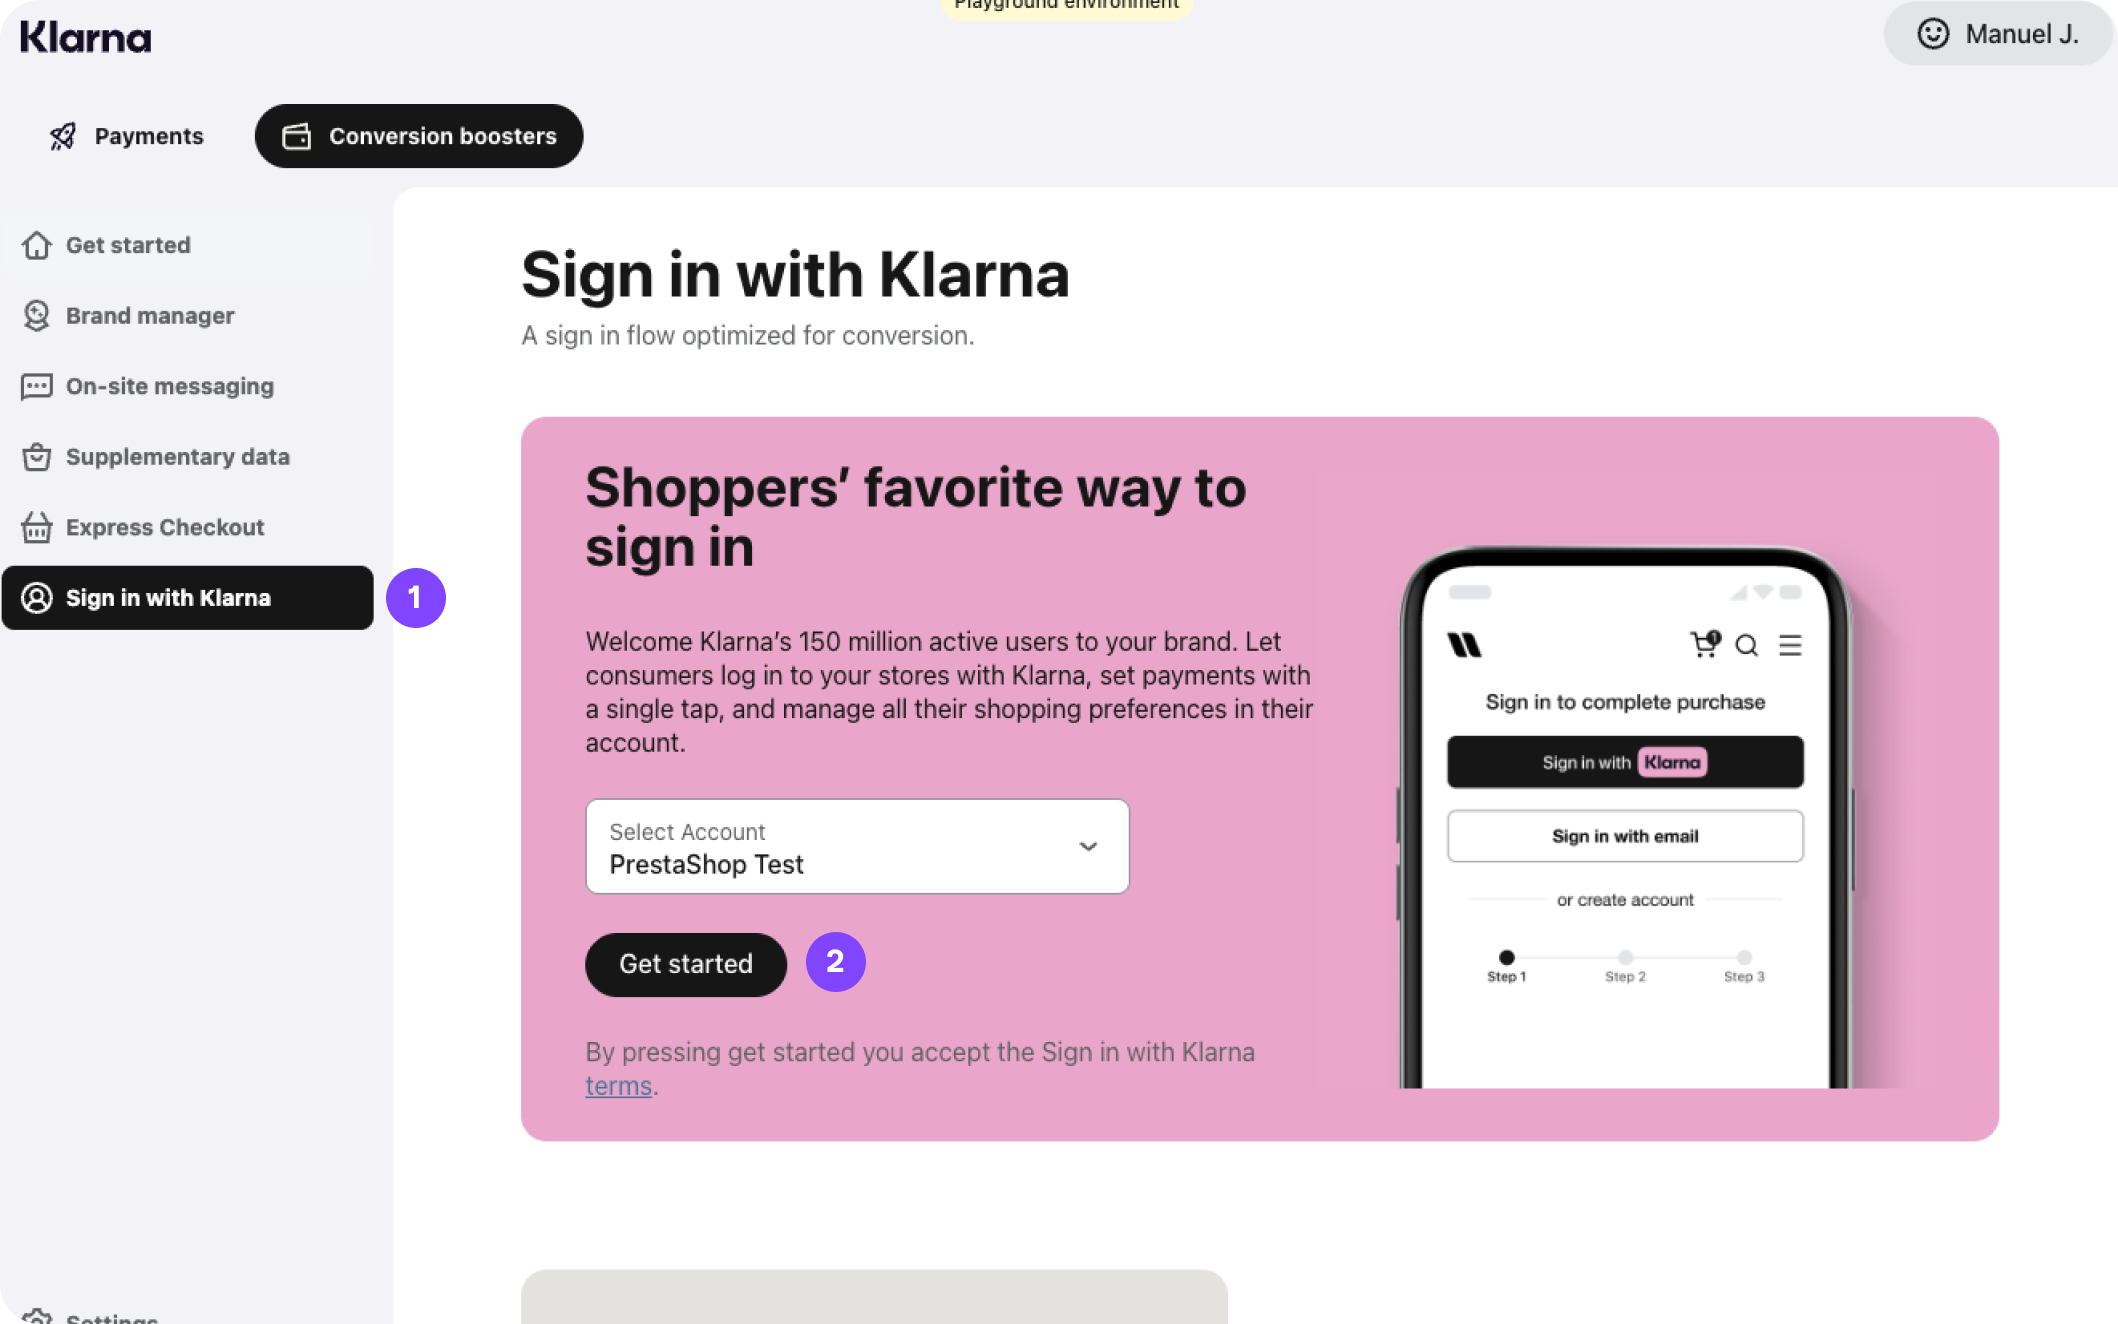
Steps 1 & 2
3. Enter the URLs for your privacy policy and terms of service
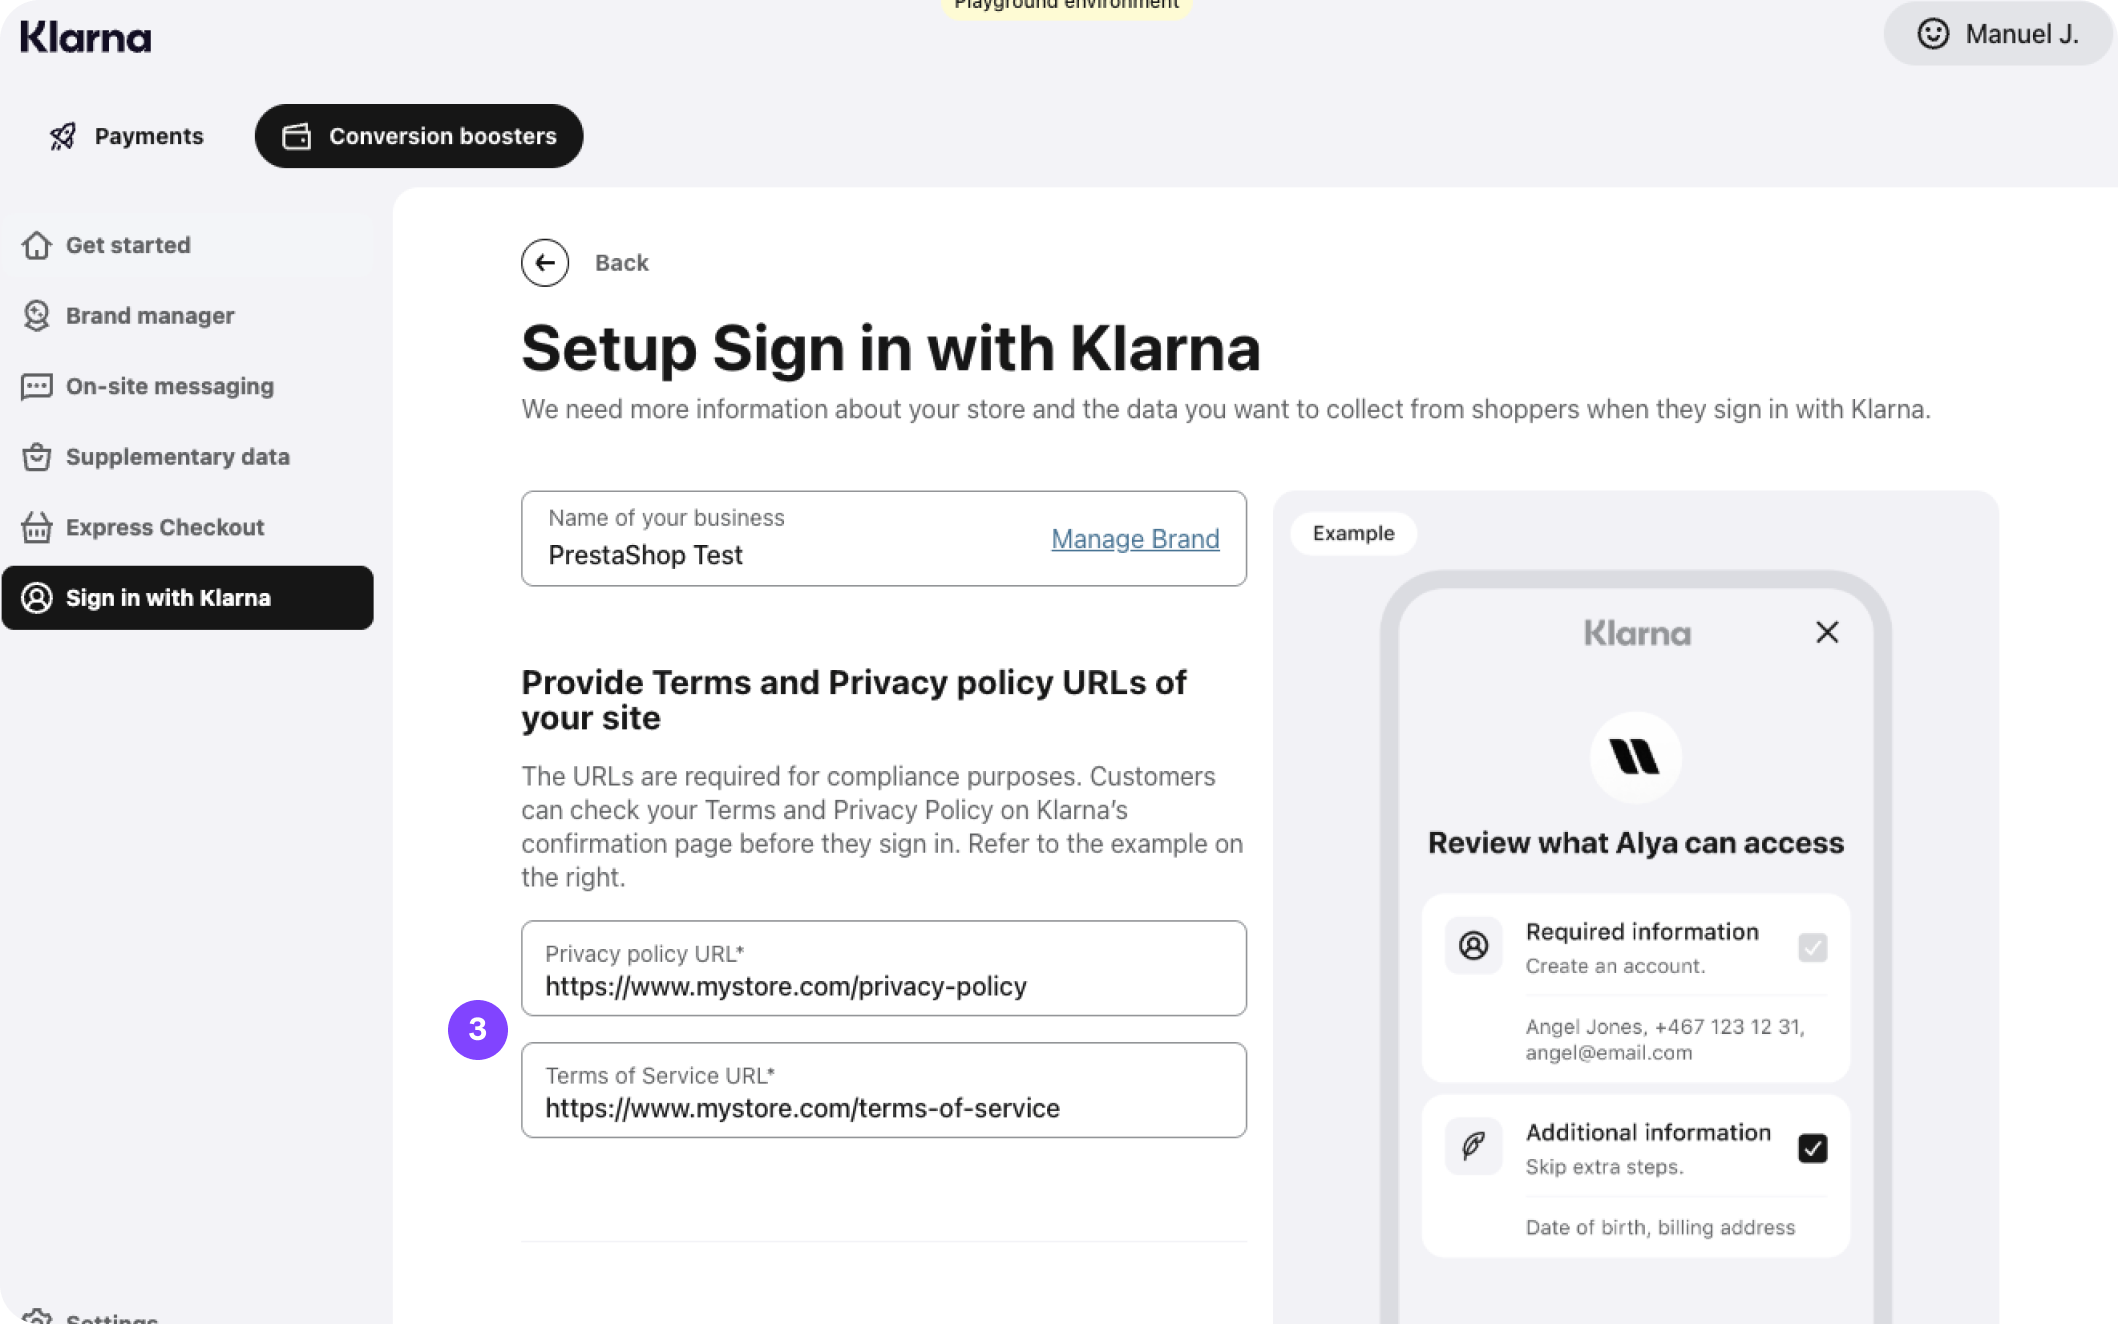
Step 3
4. Enter the redirect URL where you want users to be handed after they have signed in with Klarna, and click the Add button
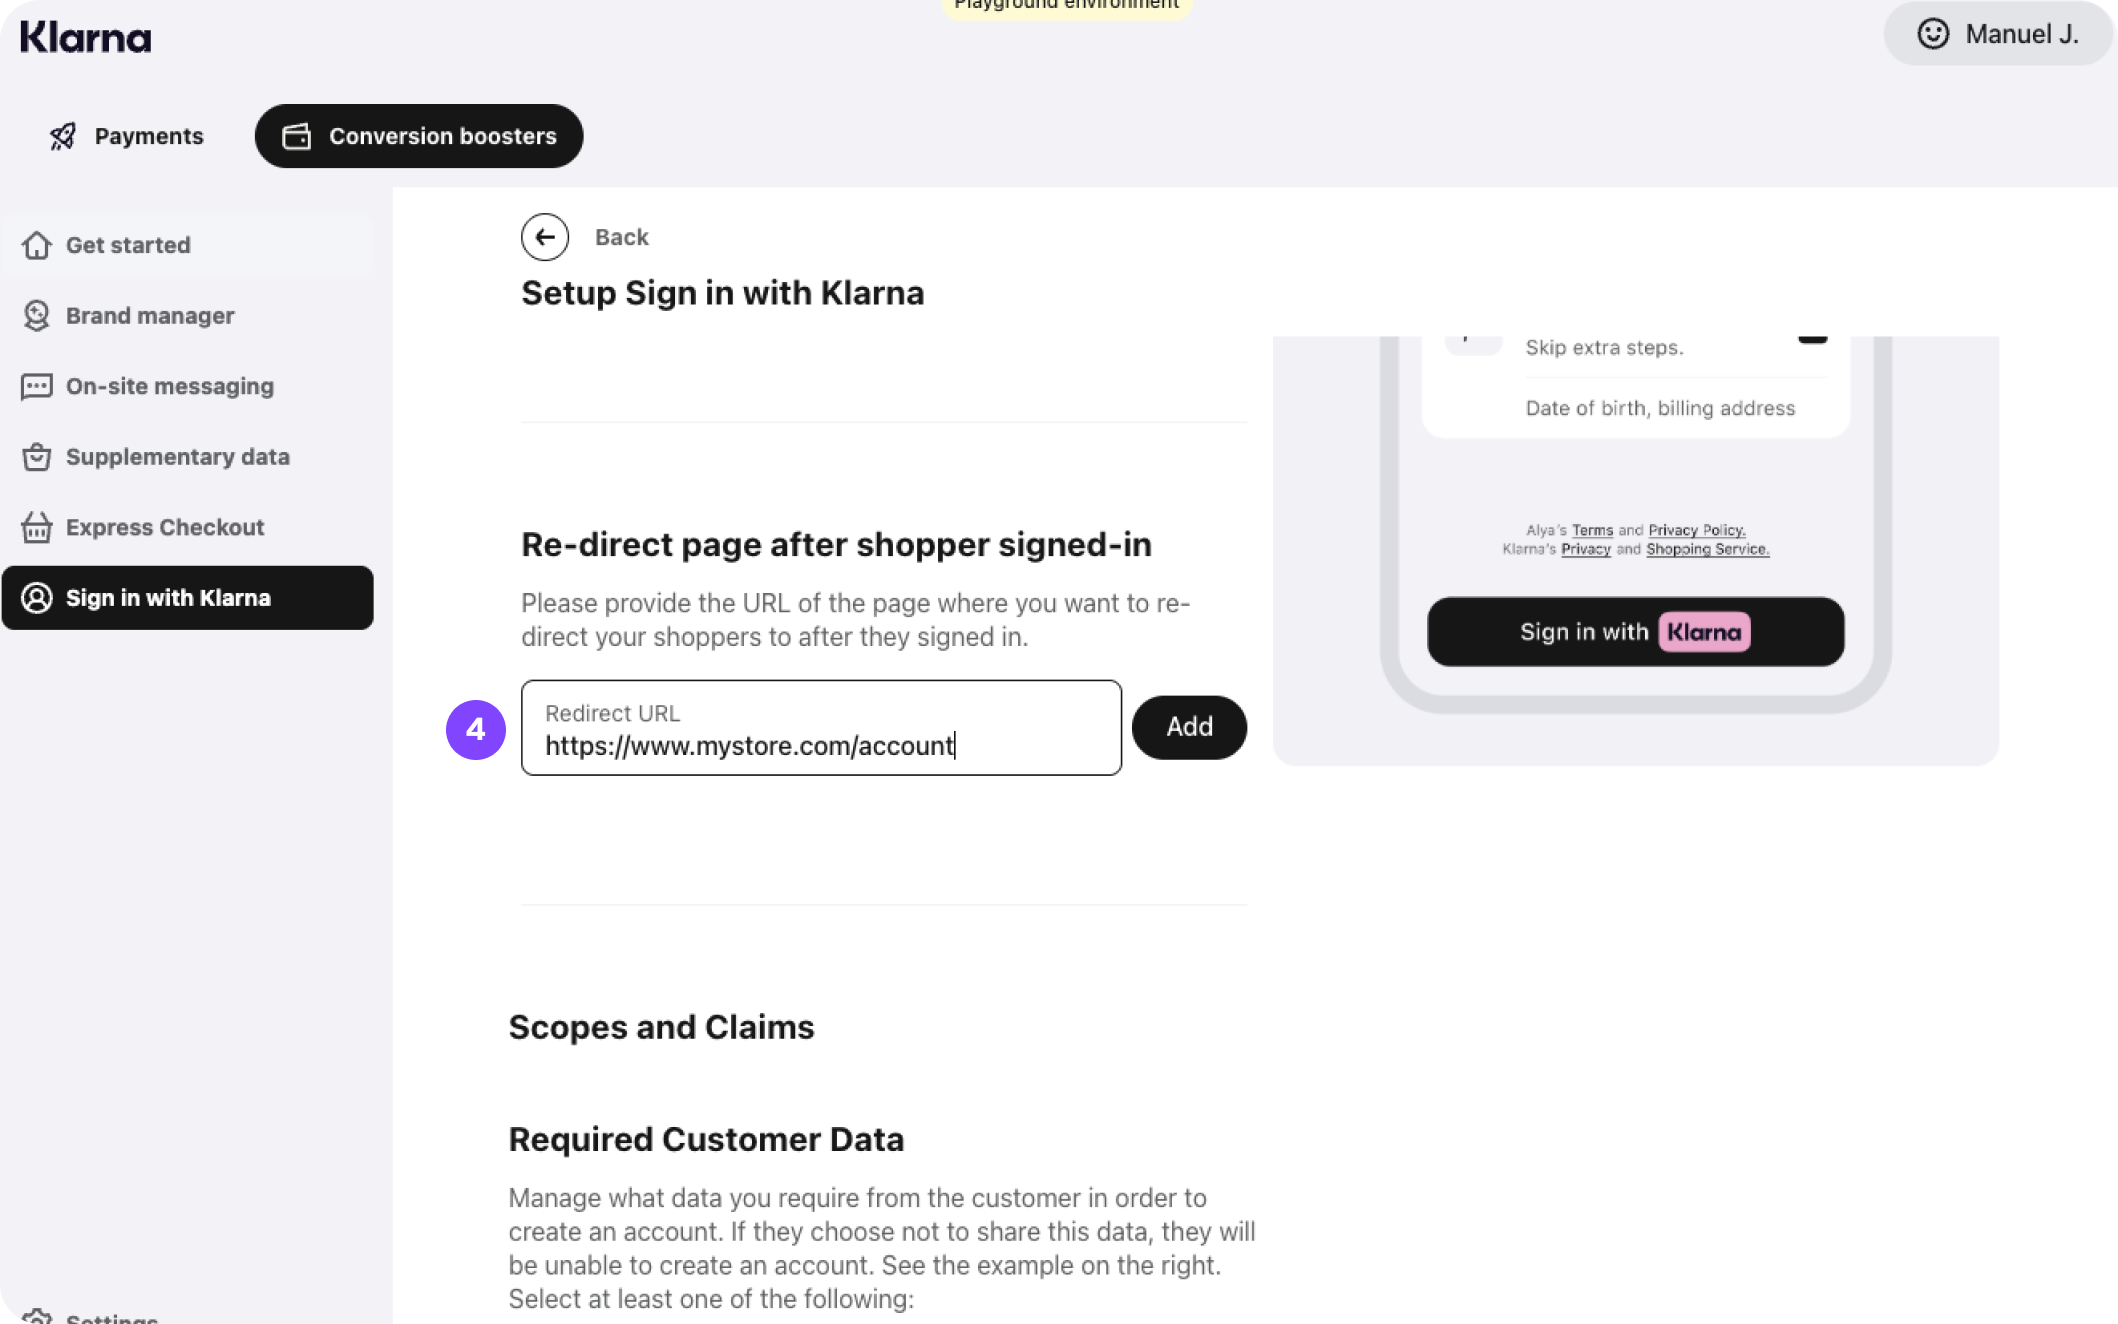
Step 4
5. Check the boxes for all three required customer data
6. only mark the boxes of the additional customer data you need. Default scopes include:
- email
- phone
- nameAdditional customer data can be optionally requested:
- Date of birth
- Country
- Billing address
- Language preference
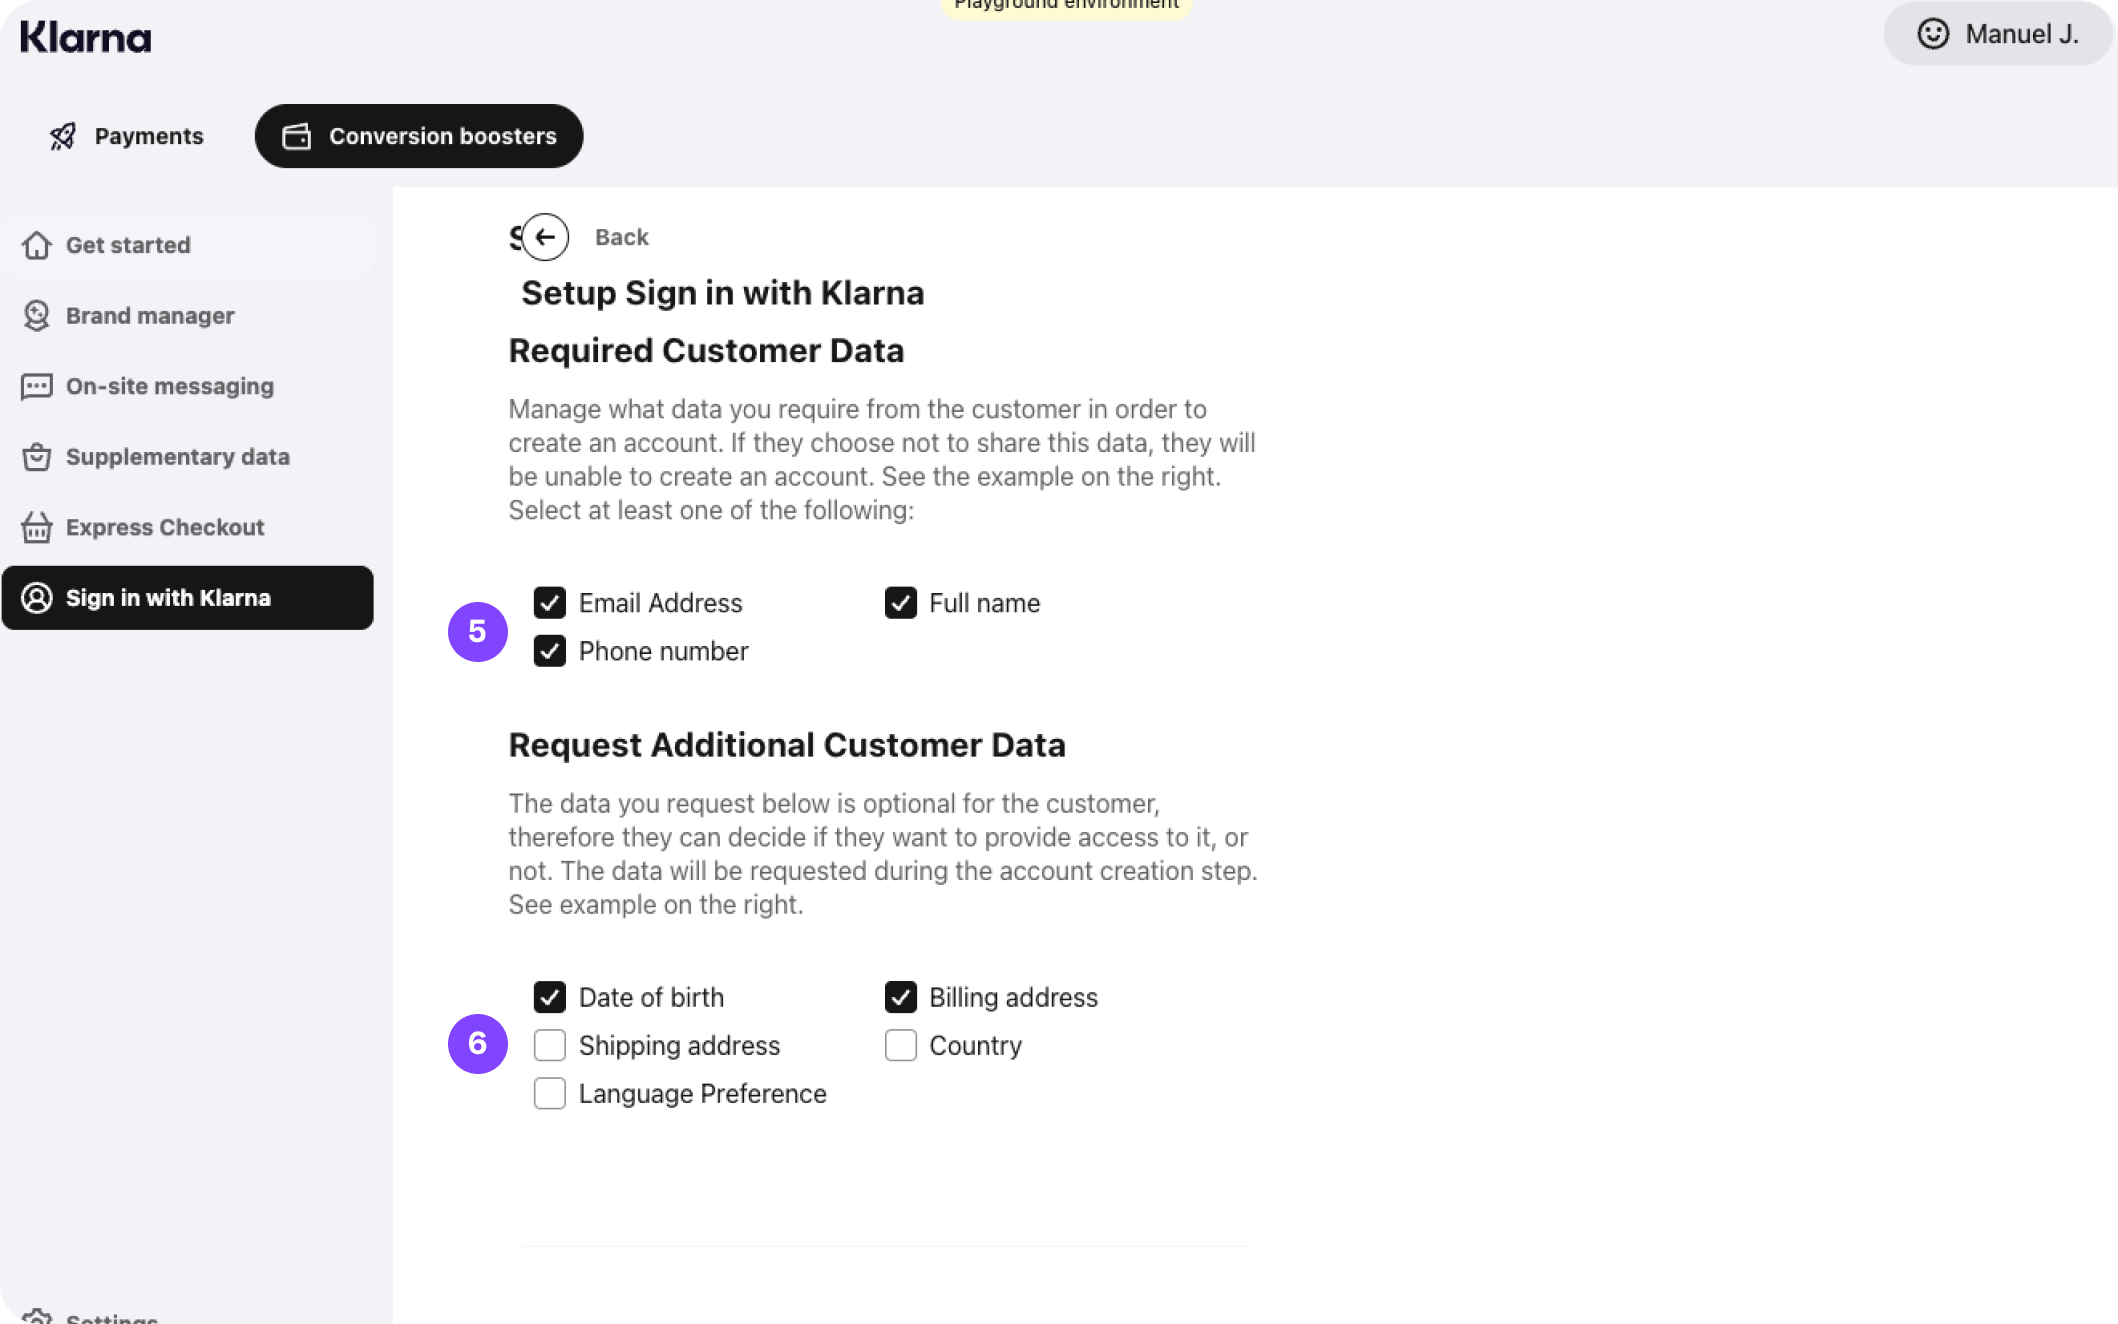
Steps 5 & 6
Scopes determine which customer details Klarna can securely share with your store after authentication.
Customer data access is optional
ImportantThis data is optional for the customer, therefore they can decide if they want to provide access to it, or not.
7. Keep the client type as public
8. Click save
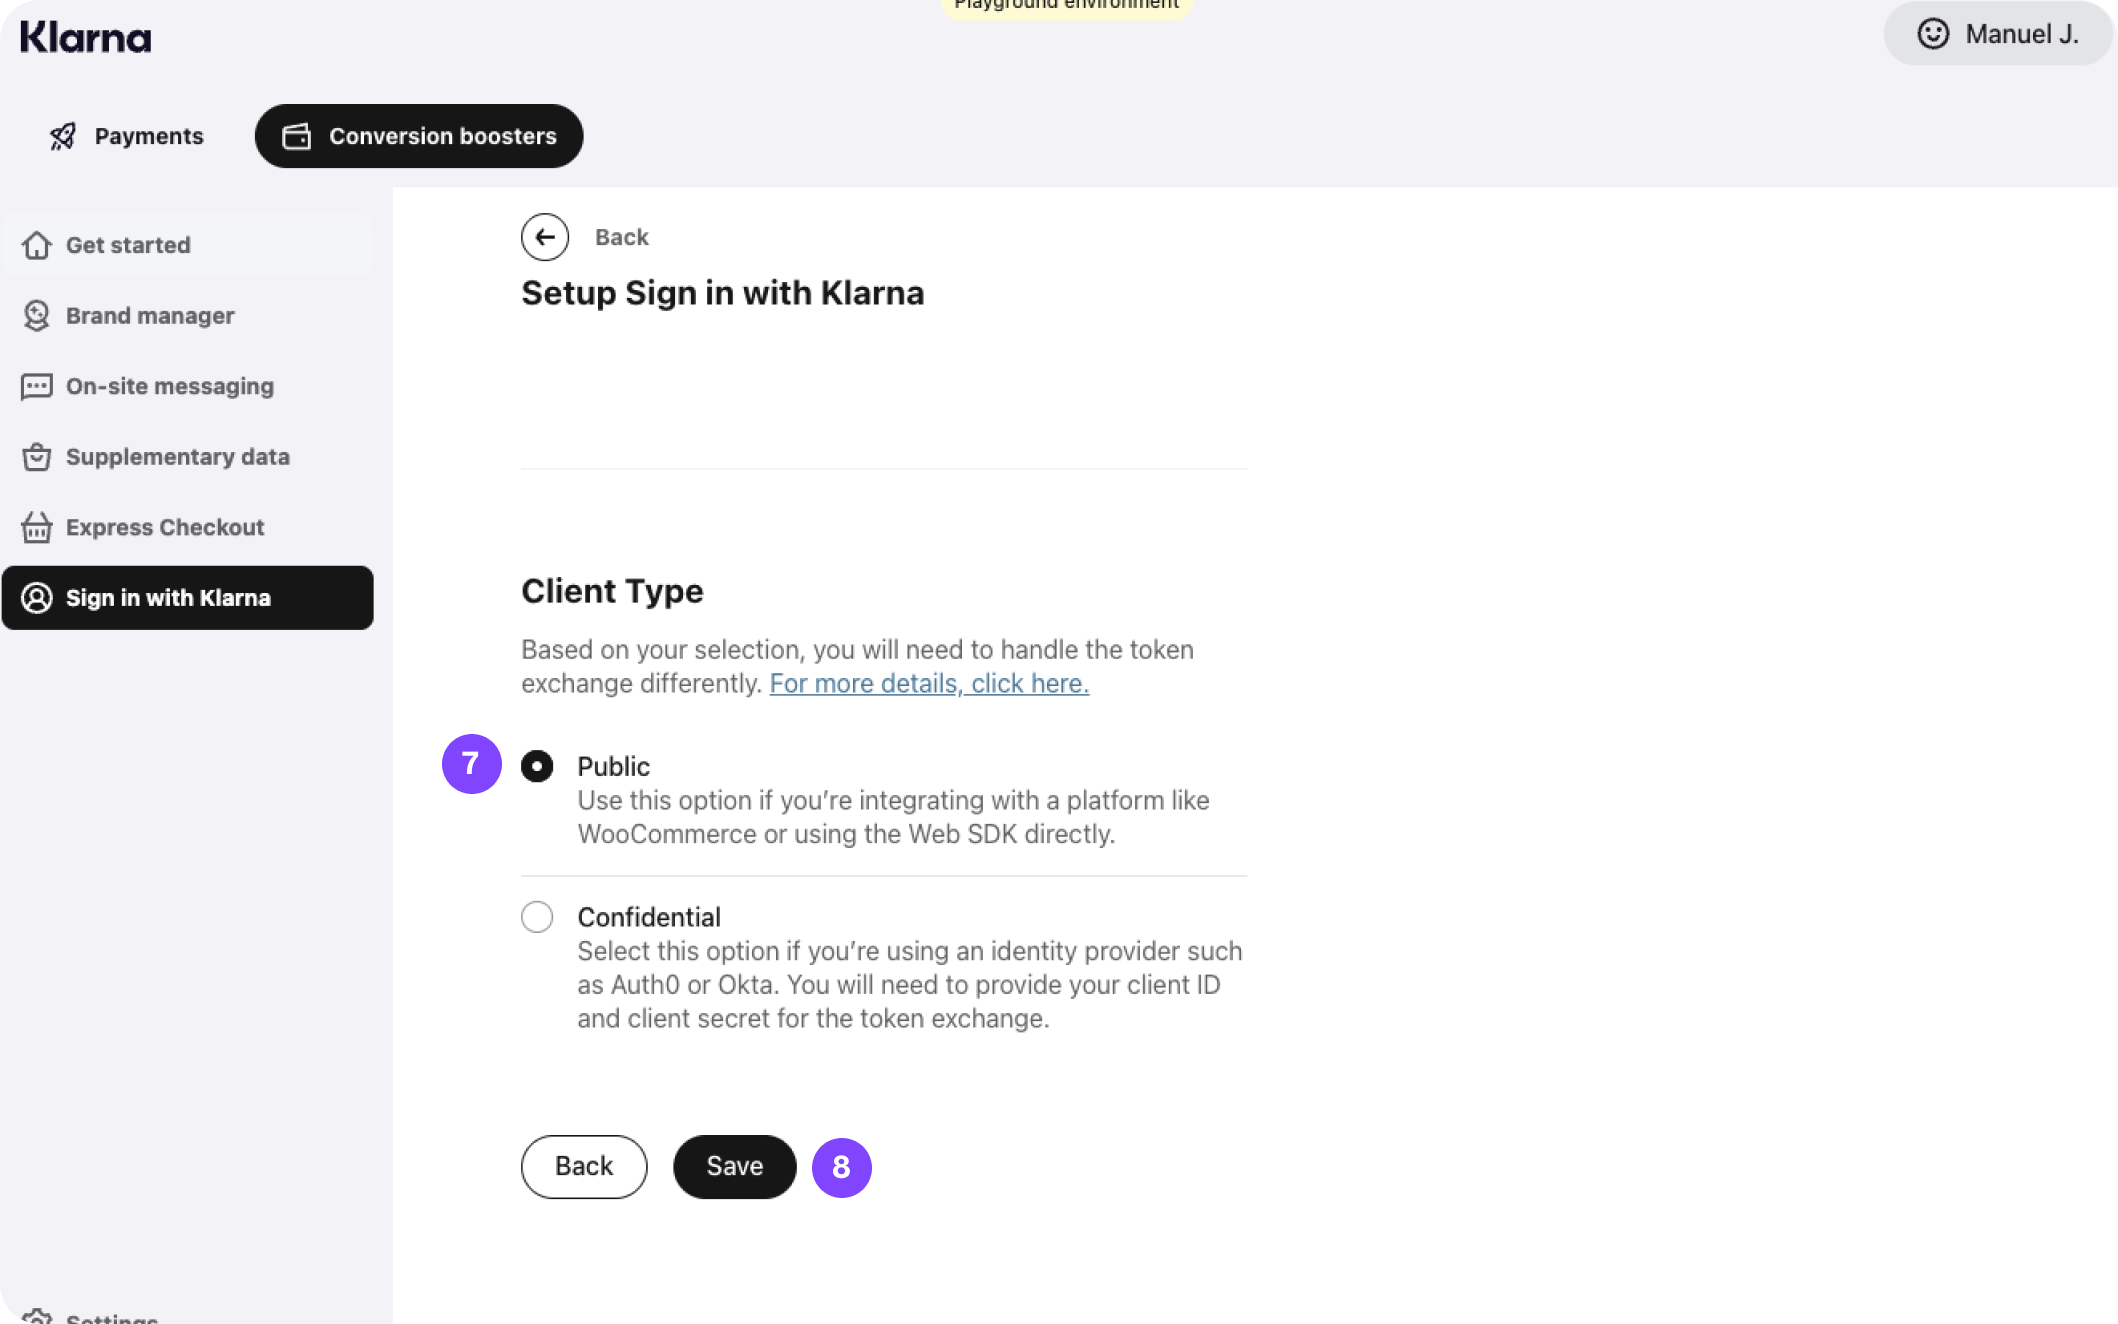
Steps 7 & 8
Enabling Sign in with Klarna
To activate Sign in with Klarna in your store:
- 1.Go to Modules > Module Manager in your PrestaShop back office.
- 2.Find Klarna Official and select Configure.
- 3.Open the Sign in with Klarna section.
- 4.Mark the checkbox Enable Sign in with Klarna.
- 5.Select the placements (pages where you want the button to appear).
- 6.Confirm that your required redirect URL and scopes are set in the Klarna Merchant Portal.
- 7.Choose the button styling preferences.
- 8.Select Save.
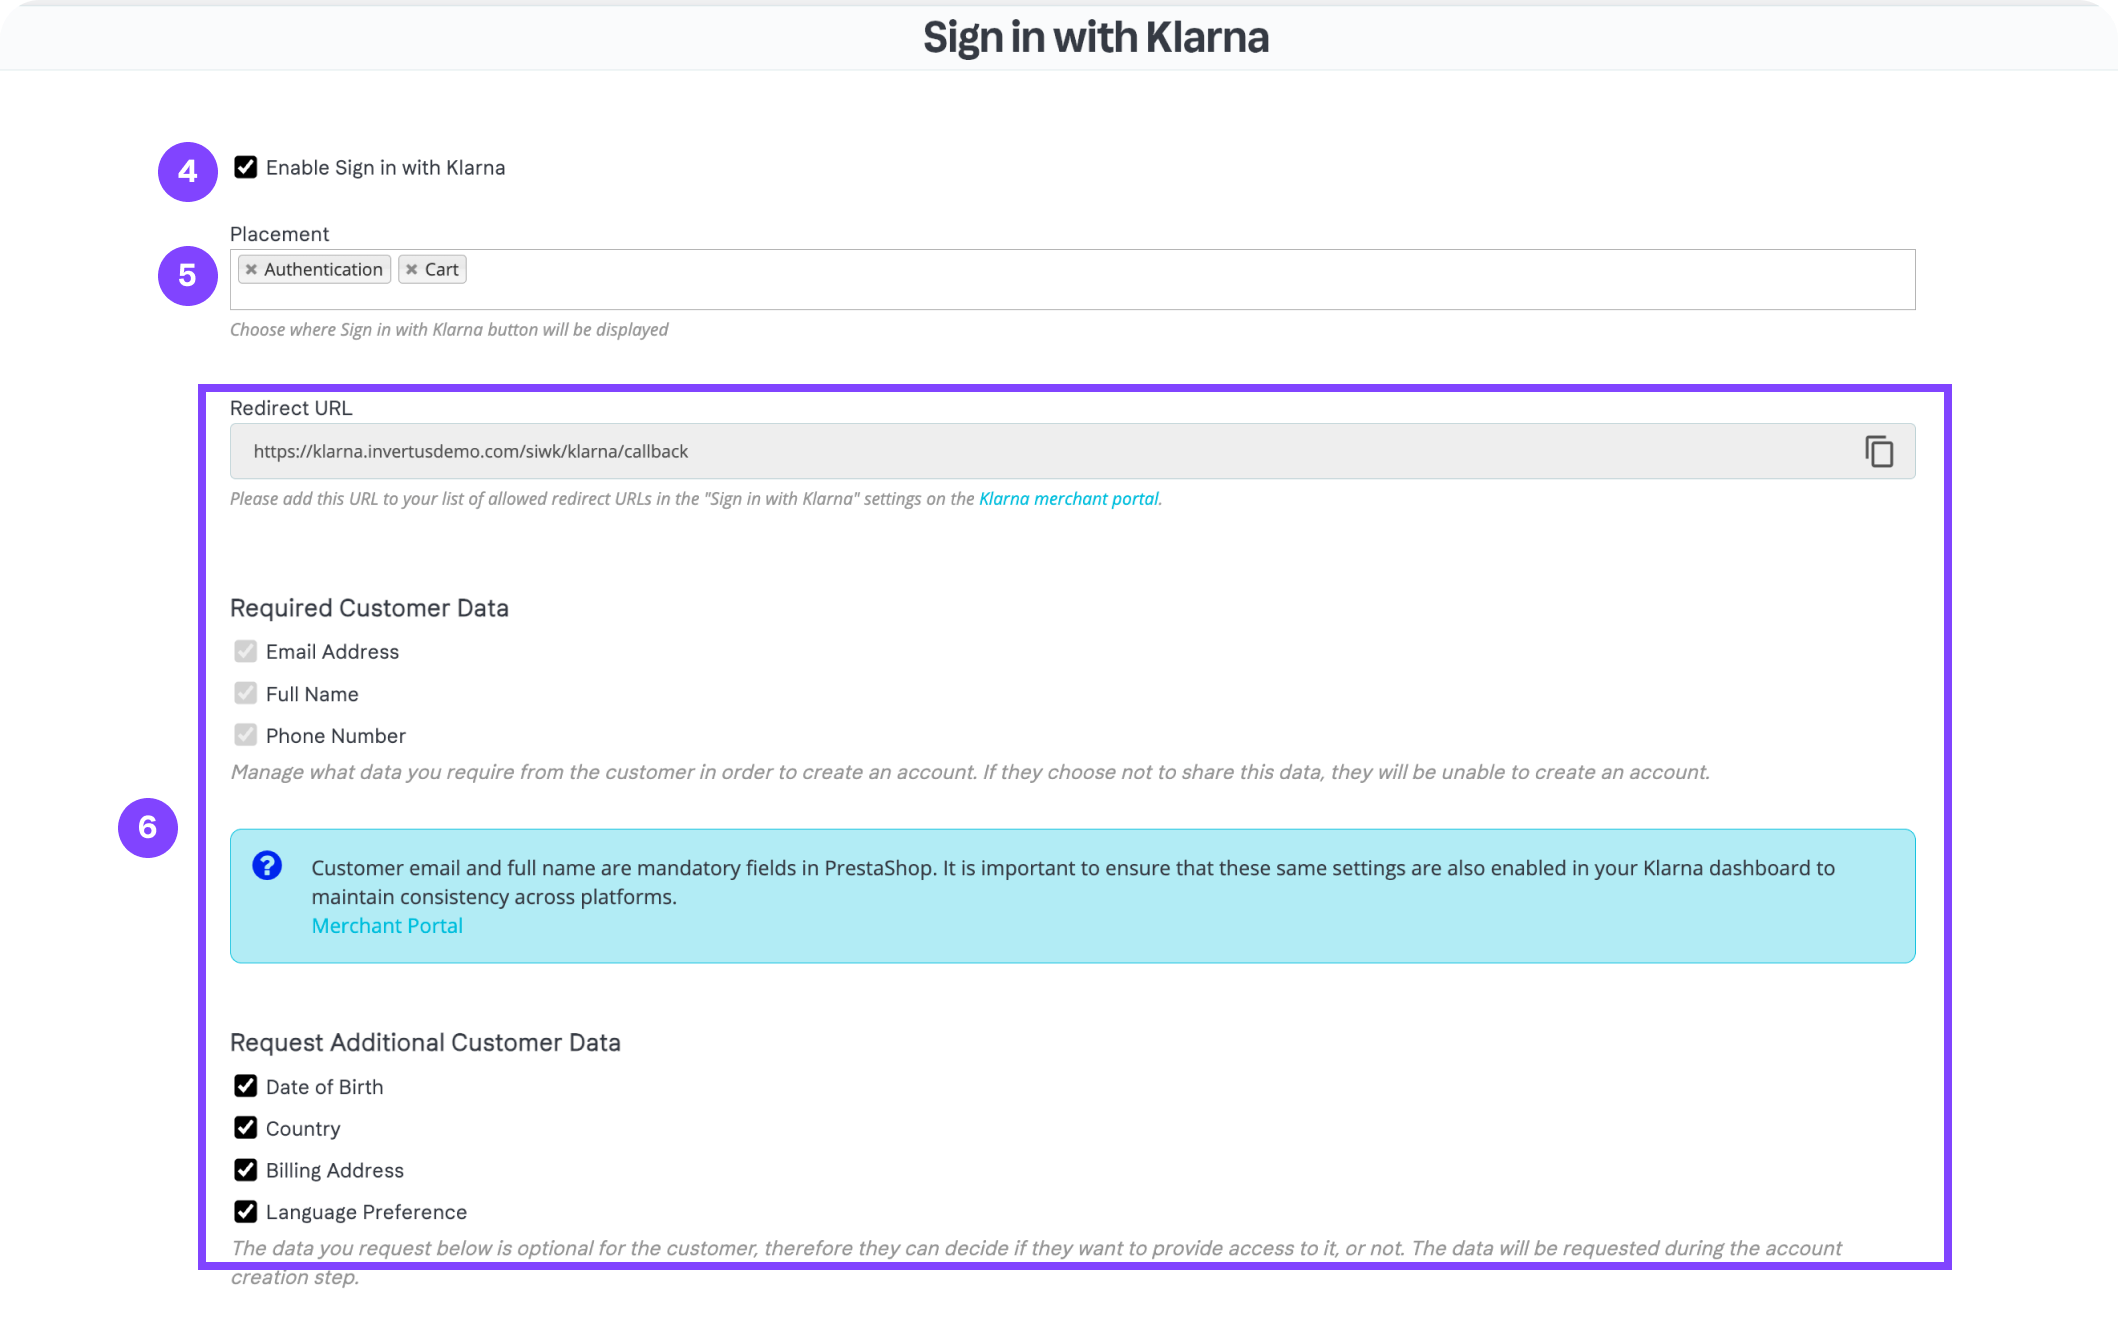
Steps 4, 5 & 6
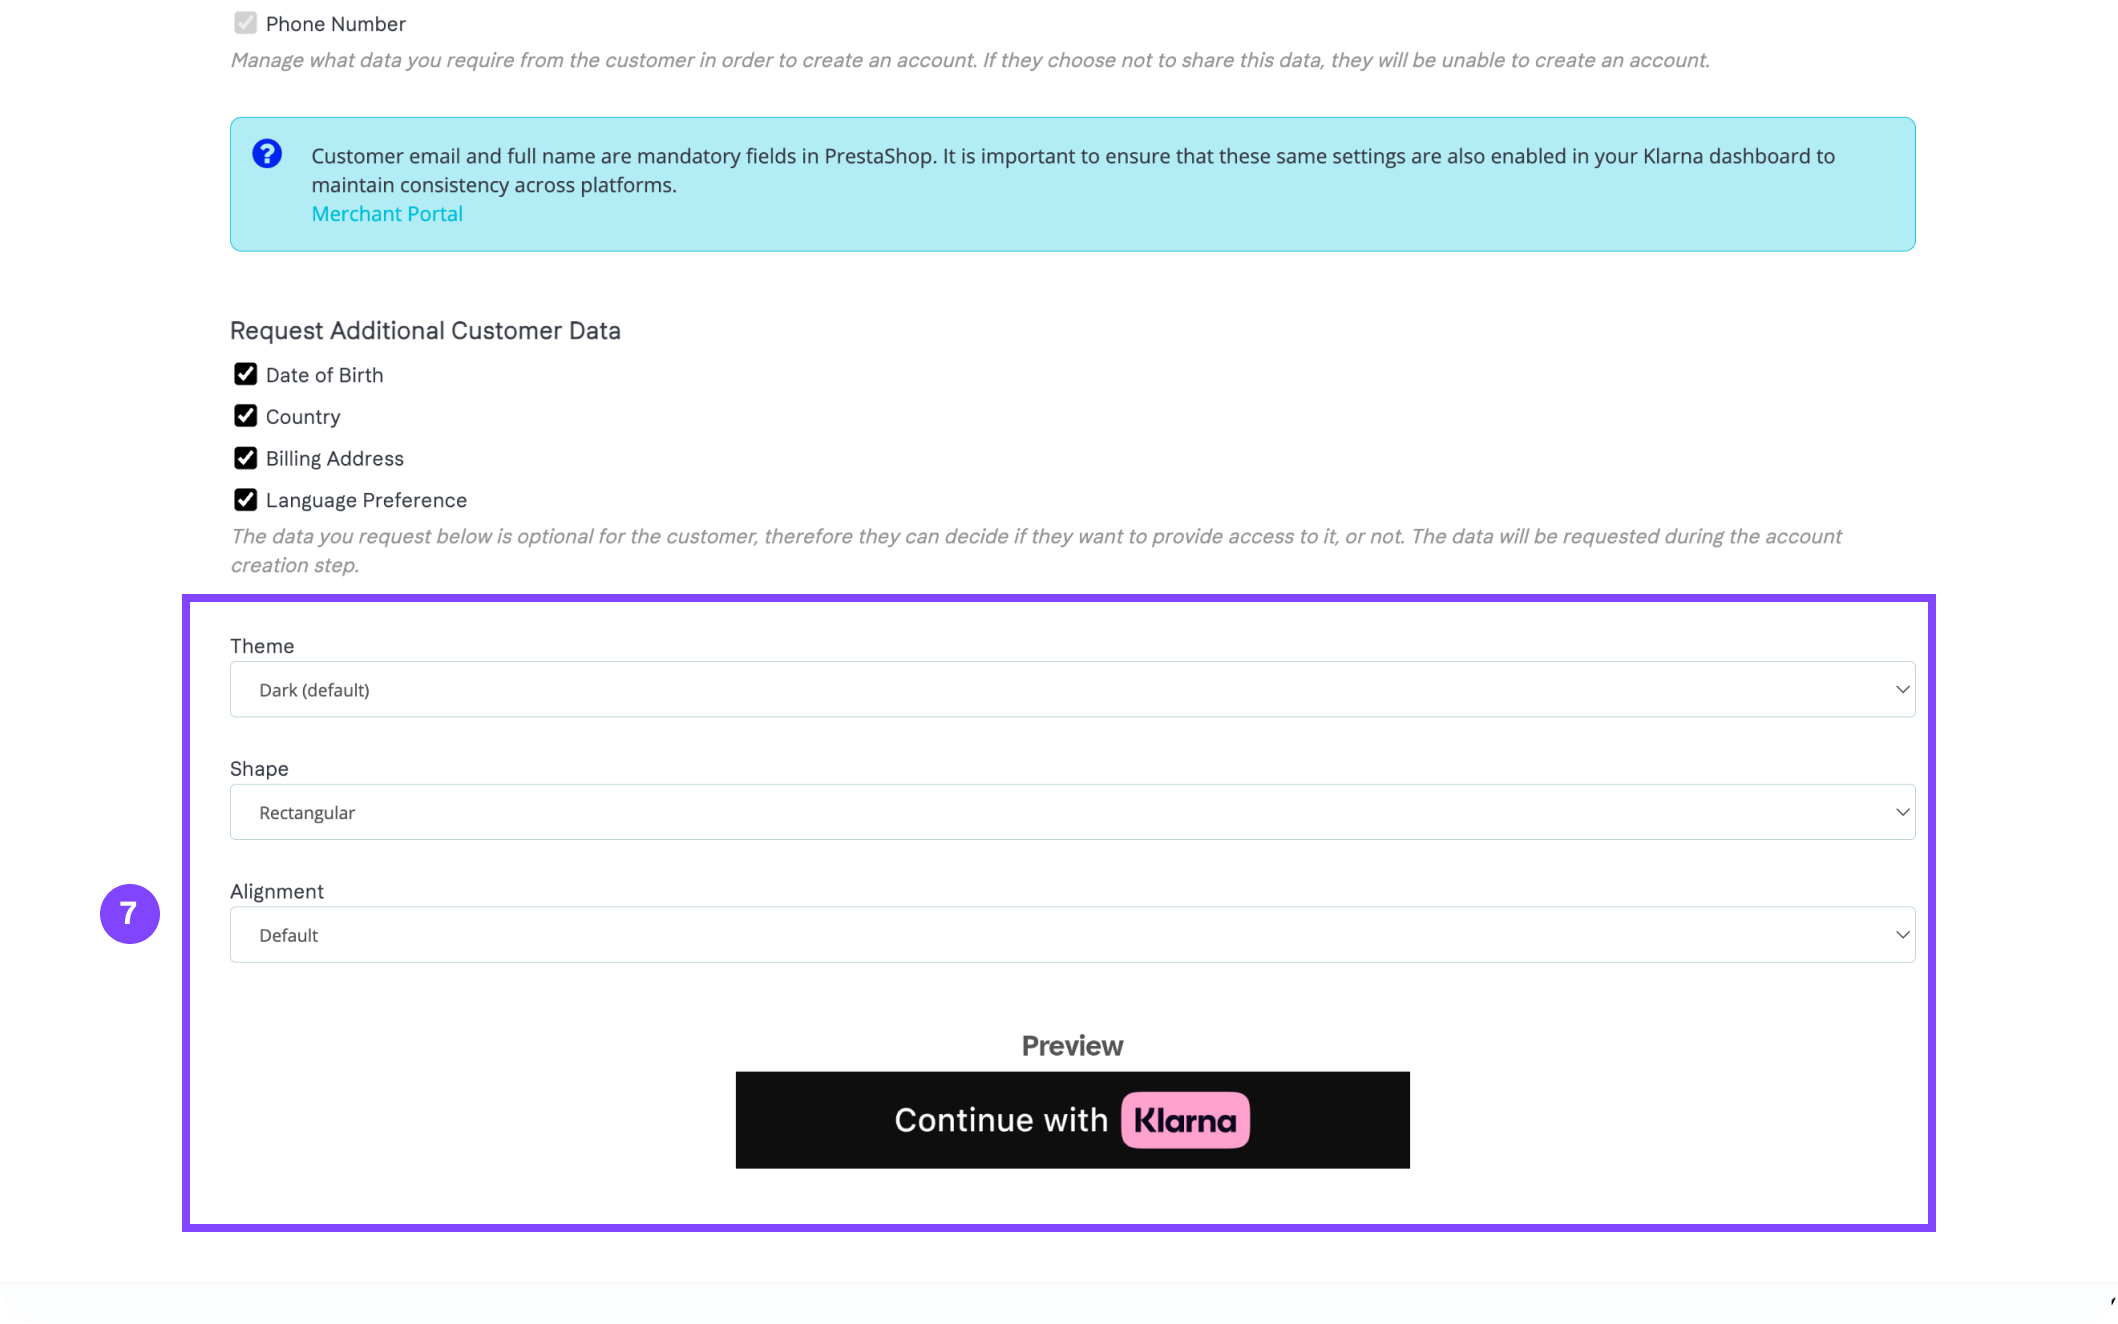
Step 7
Integration requirement
ImportantTo use Sign in with Klarna, you must register your store URL in the Klarna Merchant Portal and have a valid client ID.
If you have not completed these steps, follow the instructions in the Prerequisites section before activating Sign in with Klarna.
Button placement and behavior
Once Sign in with Klarna is enabled, the module displays the Sign in with Klarna button in supported areas of your store, such as login or account creation pages. The exact placement depends on your theme’s layout and the module integration.
Styling Sign in with Klarna
Sign in with Klarna uses Klarna’s standard authentication button design. You can refine its appearance by:
- Ensuring enough spacing around the button
- Placing it in a prominent position on login or registration forms
- Checking button alignment on mobile and desktop layouts
- Ensuring CSS rules do not hide or overlap the button container
Recommended for integration
The button inherits layout properties from your theme. You may need adjustments for non standard templates.
Theme compatibility
Sign in with Klarna works best with standard PrestaShop themes.
Custom themes or heavily modified login templates may affect how the button appears.
Recommended for integration
ImportantIf the Sign in with Klarna button does not appear, test using the Classic theme to confirm whether the issue is theme related.
Related articles
Jump to section...